Big changes!

I had hopes that the two low cylinders in the engine had stuck rings and would loosen up. I could then fix the timing chain and PS pump and drive the car while I got other stuff done. Unfortunately the two low cylinders remained at 70 and 80 lbs. Also most of the plugs show a degree of oil fouling. So really the engine is toast. I’ll fix the PS pump leakages and continue to drive the car until I can change or refresh the engine.

I have a lead on a 383 stroker (just a 350 with a 400 crank and special pistons). If that doesn’t work out I also have a lead on an ’88 truck engine that can maybe provide a re-buildable block. I haven’t checked out the cost of boring the block or the cost for refreshing the heads. The cost of a mild cam, lifters, bearings and pistons is about $600. I prefer to work on an engine and when ready, swap out the existing engine. The only delay might be the time to get the heads re-done.

I have found a set of aluminum rims, nuts and centre hub caps that are not in too bad condition. I decided to get these ($800) instead of buying new centres and rings for the existing steel wheels. If I can sell the exiting wheels for $100 or a bit more then I’m not going to be out a lot and I’ll have lighter aluminum wheels. They will lower the car’s un-sprung wheel weight and so improve the ride especially over bumpy areas.

This is the worst one. It will need serious buffing and new paint on the center section.

I’ll pick up buffing wheels and compound from Amazon – local parts shops don’t carry the stuff.

A lot of the crud comes off with cleaner wax. I’ll do the back sections and everywhere else I won’t be buffing. It’s raw aluminum so it needs a wax coating to protect against corrosion.

All ready for the finishing up of the safety check – I hope – this coming Wednesday.

New to me parts

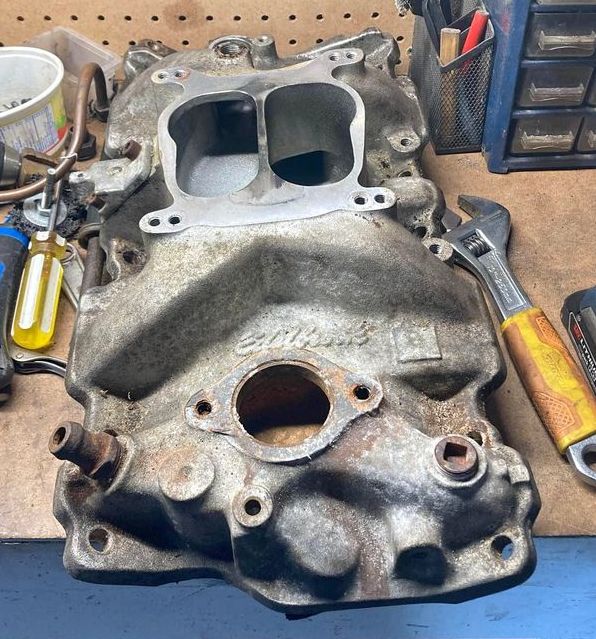
Picked up the Edelbrock manifold. Seems OK. I’ll tackle that after the timing chain work and the rebuild of the PS system.

Stopped in at Moloand’s Corvettes and found a few parts. I need a tach face, but they are as a friend says – unobtainium! So I had to pay for a complete used tach. With it I also got a complete printed circuit board for parts backup.

Also got this set of sport mirrors with driver remote. Apparently they will be a bit tricky to install. We’ll find out once the Chevy is off the road.

Can’t imaging how this piece of the door got lost. It will replace a rough piece of metal now covering the access hole in the driver’s door.

A key part I needed for the PS repairs. A PS pump bracket. Mine has a broken off lower mounting tab.

Components for delay & mist wiper functions. I’ll install this with other dash work later in the winter.

Some ugly driver’s door armrest. Nevertheless it is solid. I’ll clean off the crud with TSP pre-paint cleaner (good for removing mould too) Then prep it and paint with vinyl paint. I’ve been using desert sand colour as it is what I can get locally and it goes well with the doeskin interior.

Last little goodie I found was a good used driver’s door handle escutcheon. A good cleaning and a coat or two of desert sand spray and it’ll be ready to go.

Lookin’ forward to my winter work 😉

And the repairs go on

The flex hose on the right side didn’t seem to fit properly into the brass junction box. Not cross threaded, but just stiff and not a nice snug fit. Sure enough it started to leak during the bleeding process. Tightening it a bit more and this happened. No luck getting one from a local parts supplier so I have to wait until one comes in from a Corvette supplier.

In the meantime I’m puzzled by the lack of heat from the heater. Here’s my setup to blow out the heater radiator. Brownish antifreeze came out, but it doesn’t seem to be blocked. I checked out the heat/AC flap and it is OK. Checked out the new hot water cutoff valve and the vacuum switch under the dash to control the cutoff valve and all seems fine.

I thought that maybe I had a mouse nest in behind the heater core ( I had earlier remove nests from the inside of both doors). It would have been a monumental task to take the heater box apart so I drilled a 1-1/4″ hole in the box and used my vacuum mini hose to get in and around the inside – no evidence of a nest. I used a proper hole plug to seal up the opening.

So I am at a loss. The engine does run cool. Maybe it’s just a thermostat that is stuck open and so the low temperature of the coolant results in minimal heat from the heater. I won’t touch the badly corroded thermostat housing until the car is off the road for it’s winter repairs.

Failed safety

I have been having issues with the right rear brake setup. The right rear wheel was seized when I got to the garage. It appears to have a collapsed flex line. Something I have heard of but never experienced. That would explain all the problems. With the car on the hoist and the brakes pumped up the right rear wheel was locked. Releasing the pressure by opening the caliper bleed valve allowed the wheel to turn. So now to remove 44 year old rear flex lines.

Even using the special wrench for the job the fitting didn’t want to move. So I cut the hoses and got them off that way.

The problem was that the nut was seized onto the brake line. The lines appear to be in good shape so to save them I heated the fitting till it was red and that loosened them up nicely.

Two nice new flex lines. Sold by Raybestos, but made in China. China can make good stuff if that’s what the buyer wants. Hopefully this is the case here.

New flex lines in place. Time to bleed the lines 🙂

Storage frame mix ups!

Lift tabs and two remaining latch points sandblasted and ready for paint.

This is a latch kit I can get. I’ll buy that later.

I decided that I had the time to paint the frame. After I completed the repairs I sanded it down and applied a coat of Tremclad rust primer to the surface corrosion on the hinges.

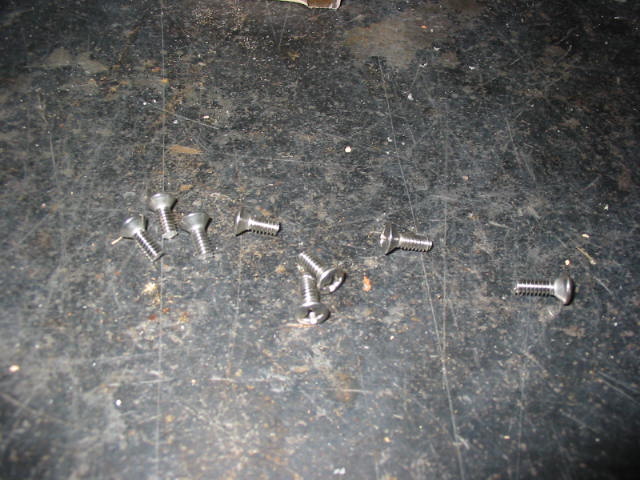
The bolts I was using for the frames stuck out on the sides too much so I had to grind them flat for the covers to fit without scraping the frame. After all this work I found that the screw kit for the storage trays contained short flat head screws that work perfectly on the frames. Only trouble was there was only 8 of them and I needed 16!

Doors with new trim pieces and painted pull tabs in place.

Doors fitted and ready for installation, but there are problems – again.

My original repairs didn’t work out. The small bolts interfered with the flanges that the frame mounts to. So I had to change the repairs this time using screws that fit in existing holes in the mounting frame.

Final fit. The frame is nice an tight on the flanges and it looks nice in the fawn colour with the gold carpet.

Heading out today to Bridgewater, NS to check out a used Edelbrock Performer intake. Hopefully it is in good shape and will not be too high for the Chevy.

Storage compartments.

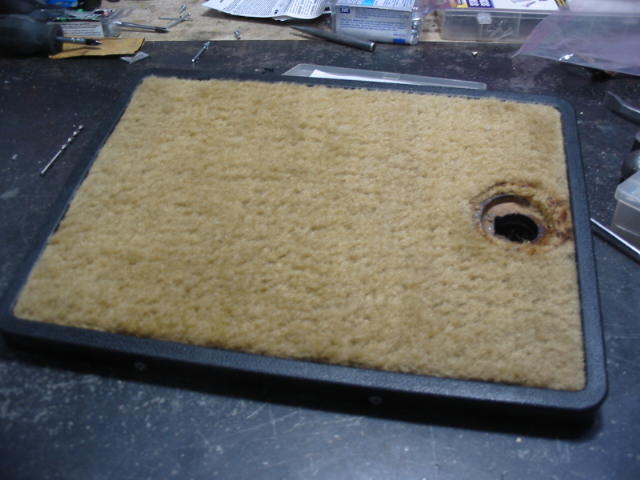
While I’m waiting to get a safety check I decided to clean up the covers for the storage compartment. The cover edges are all cracked and loose and the main frame has problems.

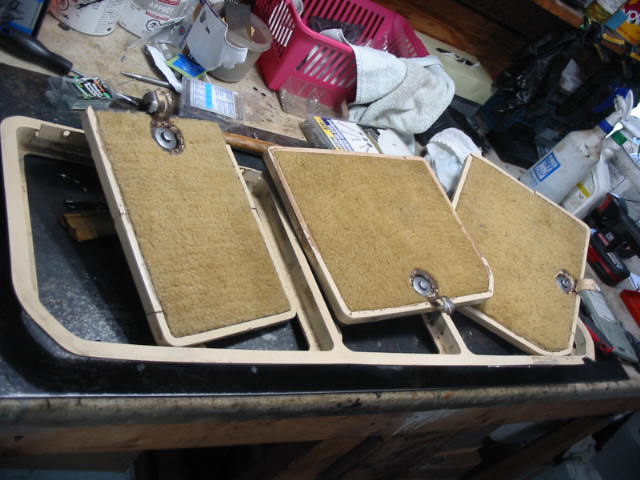
I purchased new storage lid frames. This one was a just barely fit. The other two larger frames fit more easily. I’ll clean up the stains around the latch points.

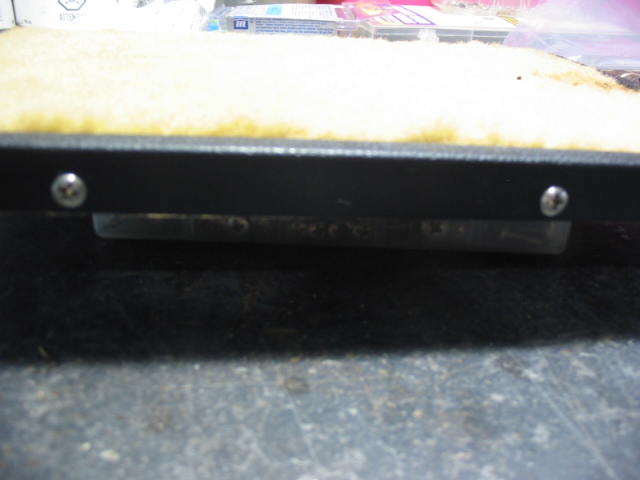
The original frames were glued in place. The replacements are drilled for screws. Rather than use screws which would leave sharp points exposed on the inside of the frames I opted for small 1/8″ tapered machine thread screws. They screwed into 1/8″ drilled holes nice and tight. No need for nuts as they were a tight fit in the plastic frame.

I could buy a new storage lid frame, but in keeping with the budget project limits I have chosen to live with the old frame, which looks pretty good from the outside except for a small chunk of the edging missing on the drivers side. The main problem is that two of the latch points have broken away.

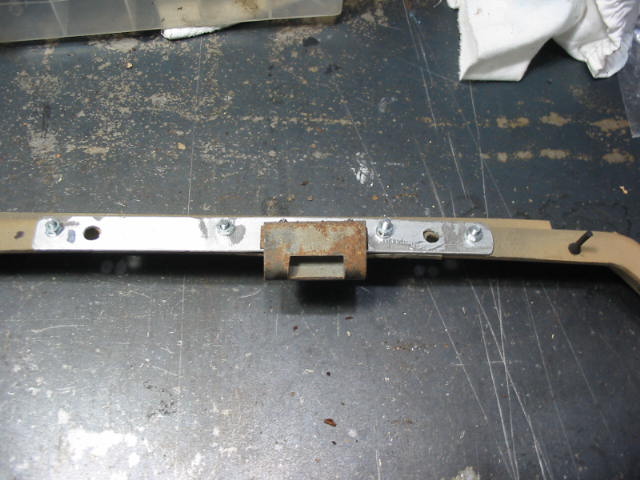
Using small strips of 3/32″ aluminum I reinforced the areas underneath the latch points. Unfortunately it was too tight a space to use my pop rivet tool so I used some 1\8″ nuts, lock washers and bolts. These repairs won’t be visible from the outside so not a big issue.

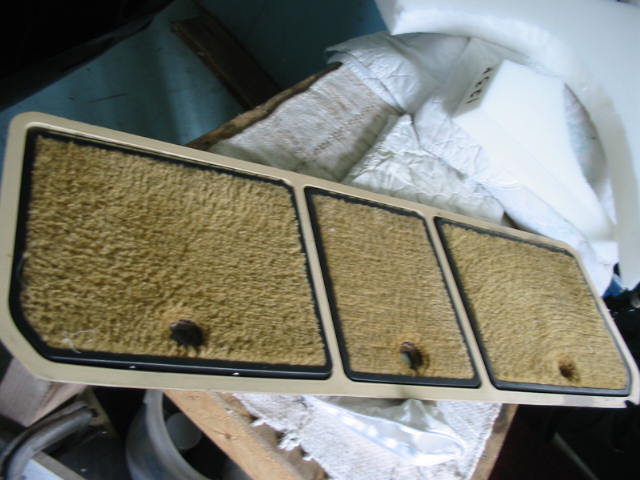
Carpets cleaned and ready for a reinstall of the latches. I may paint the door frames later, but for now I’ll leave them in their original flat black colour.

Interior

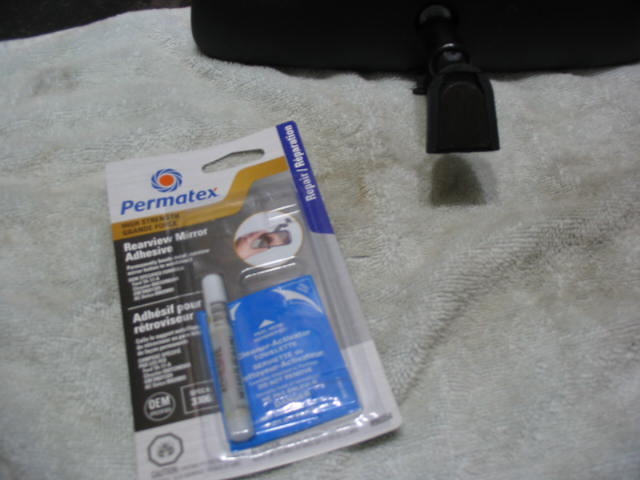
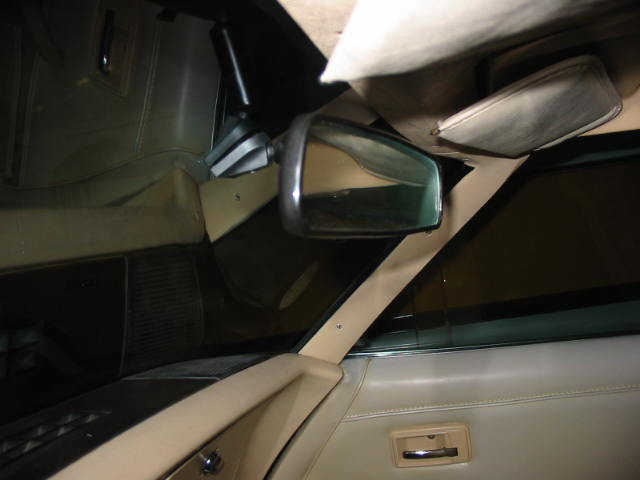
The rear view mirror broke loose twice after the windshield shop tried to stick it on. So I decided to do it myself and bought a Permatex rear view mirror adhesive kit.

Followed the directions and glued the button to the windshield.

After and hour or so I attached the rea rview mirror to the button. Seems nice an secure 🙂

After taking the car for a drive to see how the brakes were working I found that the right rear wheel was almost seized and the rim and hubcap were more than warm. I waited a couple of hours and then pulled the wheel. The pads were both floating free from the caliper and the wheel was no longer dragging. There was quite a bit of corrosion on the disc so I suppose wearing that off was the cause of excessive heating. I’ll take it for another test drive before going for the safety check.

Not much to do now but re-fit the interior windshield mouldings and halo before I take it to the garage next Friday for a safety check.

I will be heading out to the Bridgeport area down the south shore to check out an Ededlbrock Performer manifold for spread bore carbs. If it looks like it has all the mounts I need I’ll pick it up. It’s going for $200 which is about half what it would cost for a new one. Should clean up nicely with sandblasting. I may pick up some glass beads to do the job as it will leave a nicer finish on the aluminum.

I’ll also be visiting a Corvette used parts supplier. I believe he has quite a stock of cars and parts. I have been told he goes to the US and buys parts cars and brings them back for sale up here. It could be a great source for a lot of parts I need – outside sport adjustable mirrors, door handle, PS pump bracket, Cruise control system, stock air cleaner, pulse wiper assembly, ww tank, etc.

Fingers crossed for the safety check and also that we won’t get hit too hard by hurricane Lee.

Planning for next winter

Picket these up at Car Quest for a better price than offered on the Corvette websites. The timing chain is a double roller with a crank gear that can be moved + or – 2 degrees. I will need to degree the cam to see what setting to use.

The oil pump is an A55HV high volume unit. That should help with the low oil pressure. Melling states that these pumps will not put extra stress on the cam or distributor gears.

Work for next winter.

I have set up the brake and turn signal lights on the rear to work on both the regular rear lights and the backup lights. I have kept the backup light lenses and used 1156 red LED bulbs. The only problem was using all four red lights for backing up. I was getting back feed through the backup light harness. So I installed a couple of diodes between the backup switch (power) and each tail light lead. Works fine now. Four brake lights should give enough light to back up even if it is red.

More kits for next winter. Power Steering piston and control valve kits and two new ventilators for the dash centre.

In the meantime there are still jobs I can get done. Like the new seal for the right pillar post.

The windshield post weatherstrip clips are held on with rivets. Here I have used 1/8″ rivets. I used a small electric grinder with a metal burr to remove the excess material on the inside. The rubber seal isn’t bothered by the slight bumps left over.

I found it easier to mount the weatherstrip channel first and then fit in the seal. This isn’t permanent as I’m ordering new channel screws. I will glue the seal down later. For the time being it holds itself in place with the channel lips.

Next I’ll take it for a test run to check the brakes and then off to a garage for a safety check so I can finally get it’s registration finished and a new plate.

Always more problems!

Finally the big day and I got the new windshield in place. Looks nice, but what you can’t see is all the rust in the window channel. I convinced the shop to install anyway – I did have to drive home. I’ll pull the windshield next winter and deal with the rust so the windshield butyl seal will have a good sealing surface.

When I arrived at the windshield shop smoke was coming from the right rear wheel well. Not good. Looked like the brake pad was sticking to the rotor. Turns out one of the four piston seals had given way. The leaking brake fluid likely caused the smoke. So I drove it home in stages, letting the brake cool off each time.

The rotor looks a bit rough, but it should smooth out OK with a new caliper and pads.

Comparing the new pads with the old. The calipers and pads were new when I got the car.

Nice new rebuild caliper (Mexico) and new pads. I really could use two pad spreaders. I set one end of the caliper on the rotor and then move the spreader to the other end.

Caliper in place. Following the service manual I bled both rear calipers. I assume the front are OK.

Using this set-up I’ll get my wife K to press the brake pedal and I’ll double check that there are not bubbles.

I will eventually change it all over to DOT5, but that’s a job for another day.
New 3″ driving lights. Also new 2357 amber bulbs for the front and red 1156 leds for the rear. 2357 bulbs are a bit brighter than the regular 1157 units. Every bit helps I say when it comes to daytime driving. The red leds are so bright that I’ll need to install red 1157 bulbs in the regular lenses to get an even brightness. The two black thingies are blocks to raise the driving lights into a good position behind the grille.

Should be bright enough for a driving light and a fog light when needed.

Nicely tucked away behind the grille. I did have to shave a tad off one grille vane on each side to allow for enough up-an-down adjustment.