A new screen for the case of the transducer solenoid. It draws air into the unit this way as needed.
The first paper gasket wasn’t thick enough to hold the solenoid cover firmly in place, One made from 1/8″ cork did the job nicely.
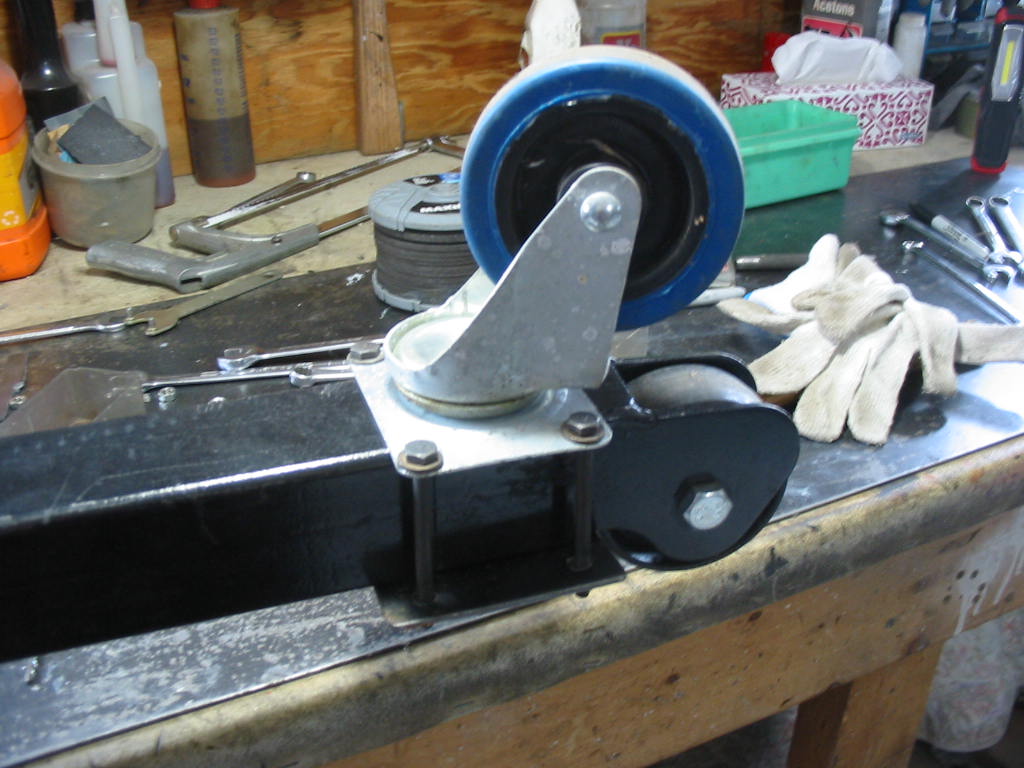
All painted up and ready to be stored for later installation 🙂
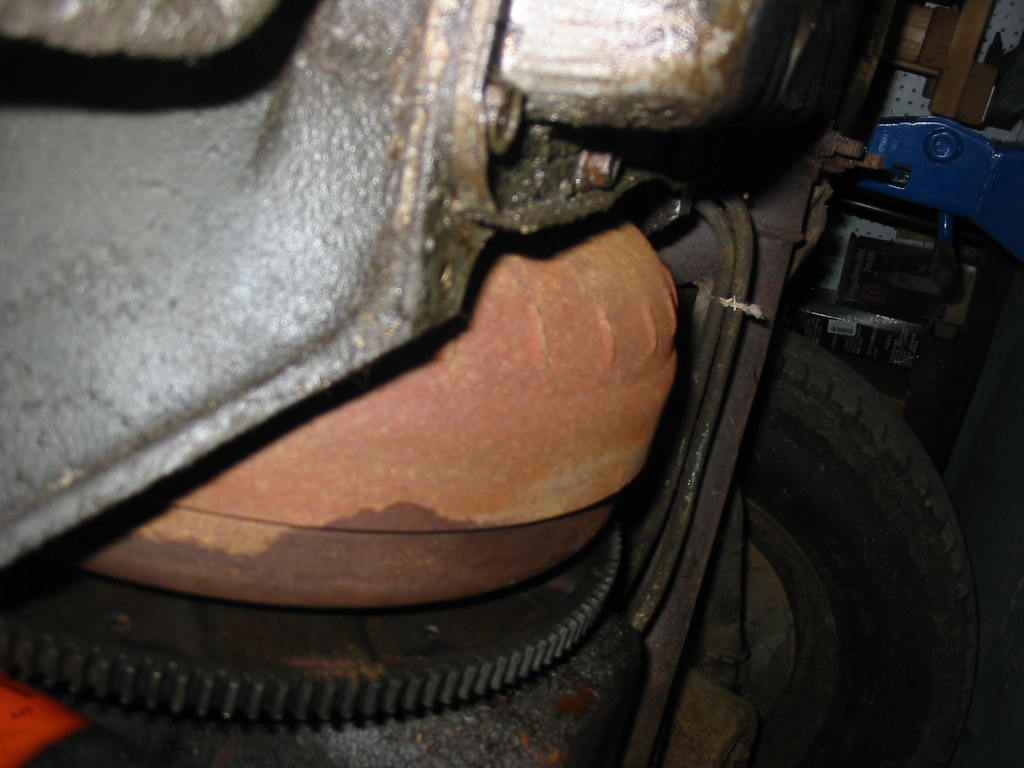
On to the exhaust manifold removal. One side came off with no problems. I used the impact wrench as I though it would shock the bolts loose better. My big concern was breaking a bolt off in the head. I really don’t want to remove the heads.
A stud on the other side didn’t want to come off. So I thought I’d cut off the head and then pull the manifold off. Once I did that I found that the stud was loose in the block, but stuck in the manifold.
I had to use two large chisels to get behind the manifold on either side of the stuck stud to force the manifold off. It took quite a bit of work to get it off as the stud was frozen tight onto the manifold.
Once the manifold was off the stud came out nicely. So both manifolds off without breaking any studs!
Good starter solenoid ruined! Starter came off OK, but between one thing and another the main solenoid contact post broke away. Still it’s a good running starter. The starter on the my Chevy is new so I shouldn’t need it, but I’ll clean it, check it out and keep it as a backup.
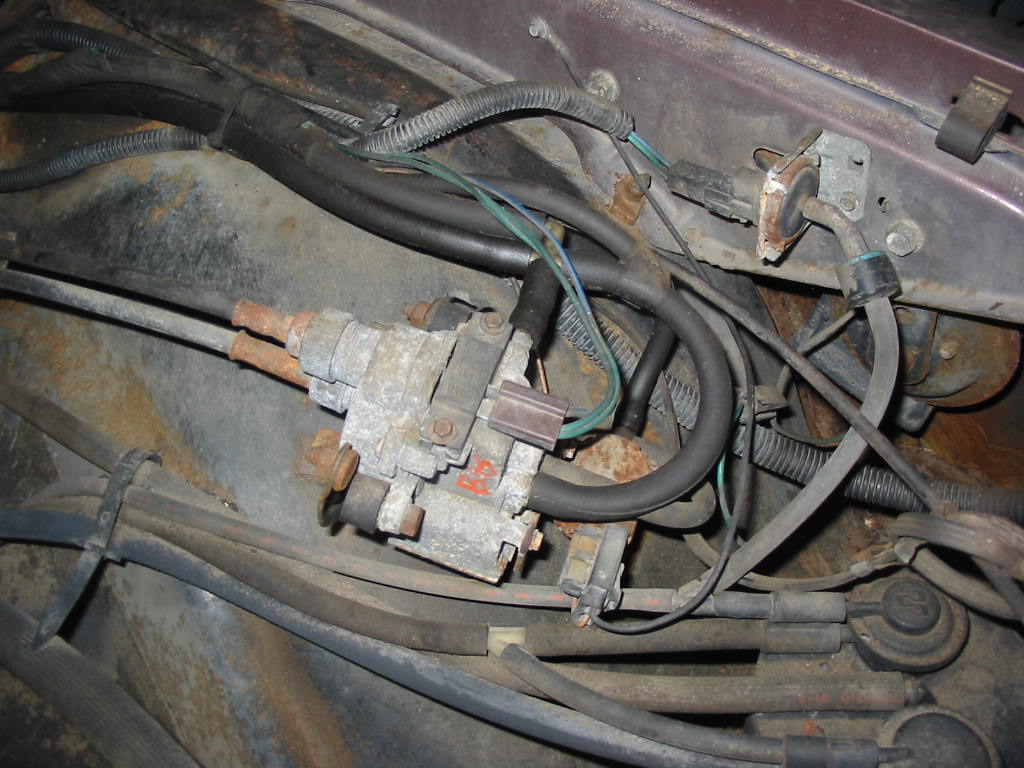
The cruise control system is totally mechanical. This part is the resume solenoid. I could have taken it apart, but it is a sealed unit and should be OK inside. I used my handy-dandy battery eliminator to test the solenoid and it clicked nicely and the vacuum could be detected going on and off.
I tested the main assembly with a drill and a stub end from a speedo cable. I was able to test the low speed cutoff switch this way. I tested the on switch (solenoid showing on the bottom of the unit) by grounding the unit and then putting 12 volts to the hold terminal on the top of the unit. All worked good. I used a bit of Jig-a-low lubricant on the solenoid shafts to make the solenoid shaft move smoothly without leaving a oily residue – the stuff is sold for lubricating vinyl windows.
Back to the motor. time to remove the front drive pulley and harmonic dampner. I used my impact wrench to get the crankshaft end nut and washer off – using hand tools is hard as you need to hold the engine from turning. I also used the air tool to get the pulley off and again to spin the puller to take off the harmonic dampner.
Lots of red sealant around the crank so I expect there was an oil leakage problem. I’ll be replacing the timing chain and sprockets and putting in a new crank seal in the cover at the same time.
Next: engine cleanup and exhaust manifold removal.
Draining the last of the old antifreeze – both sides. I hate working around antifreeze. It always seems to get spilled and it’s hard to cleanup and is sticky.
I’ll give the exhaust manifold bolts at least three soakings with penetrating oil before trying to get them off. I don’t want to have to take the heads off to get broken studs out. If they won’t come easily I’ll have to borrow or rent a torch set to help remove them.
Pretty well stripped out now. Friend Don will take it home to see if he can use the rear end.
I am tackling the cruise control transducer to see if it has any life left or is it all corroded inside.
First step is to bead blast the unit and get all the exterior corrosion off. Looks a whole lot better. Now to check the internals.
Happy day! The internals for the most part are excellent. I’ll need to take it all apart and clean off any corrosion. The circled part is the most corroded with a very tiny screw that is probably seized in the pot metal body.
Came apart fairly easily with only one screw breaking off. I cleaned up the contacts and started the re-assembly. The electric connector’s gasket on the top – right side in the photo – wouldn’t come off easily so I used a light coat of red gasket maker to do the job.
The cover on the bottom of the unit needed a replacement gasket which I made from a sheet of general purpose paper gasket I have on hand.
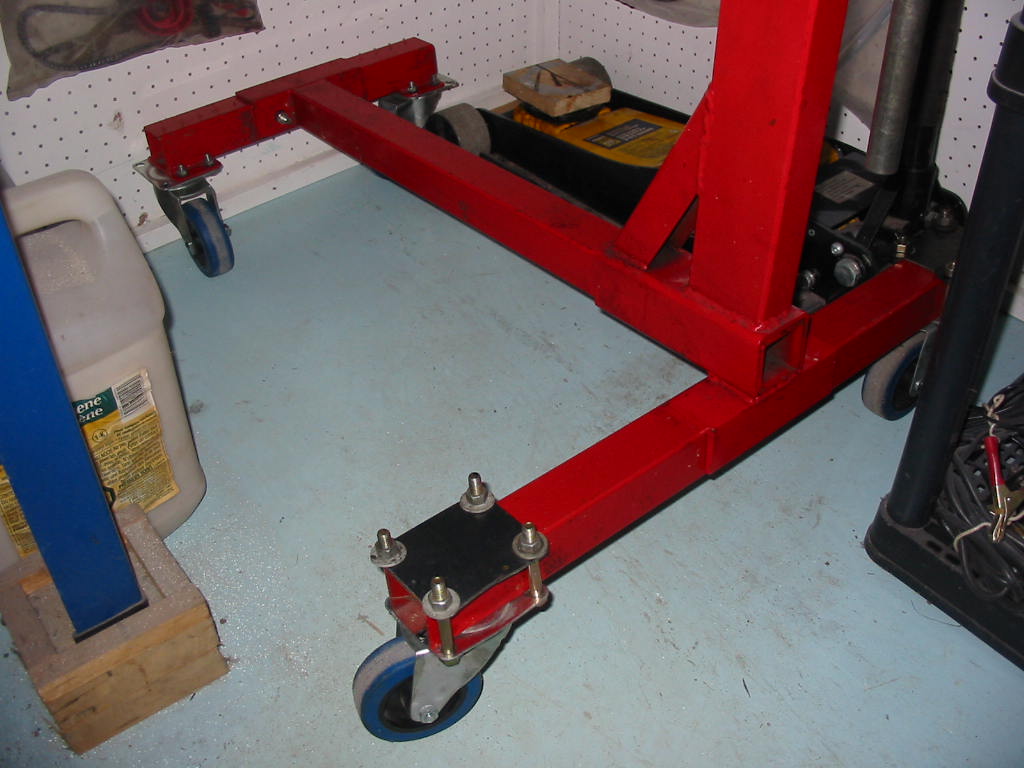
A little rig I set up some time ago to hold transmissions to ease withdrawal and installs. There is a pin on the bottom of the plate that fits in the jack’s mounting pad pin hole once the pad is removed. I’ll also put a sheet of rubber on the place to reduce the metal to meta contact which would be slippery – especially if it gets oily.
I’ll use this to support the trans while I remove the engine. The engine and trans are only supported by the front engine mounts and one at the rear of the trans.
The engine is set back away from the front of the car. In the end I had to remove the bumper so the engine hoist could be positioned over the centre of the engine – it just made it, whew!
I’ve removed the grille, headlight surrounds, etc for the former owner in case he wishes to do up a wall display.
The last part of the prep was to remove the four remaining blots securing the trans to the engine block.
I took the weight off the engine and removed both front mount bolts. I then raised the engine until it cleared the engine brackets on the frame – raising the trans supporting jack at the same time. I wiggled the engine a bit and a crack appeared between the trans and the engine. I then used a long pry bar to gently separate the trans from the block.
Up, up and away – the engine is out. the only hitches were the trans vacuum line which got snagged and also the trans lines which had a bracket on the block close to the pan and hidden behind the right engine mount. Fortunately I didn’t move the engine too much before realizing the problem so the lines didn’t get damaged.
Out and resting on t he floor. Tomorrow I’ll get it on the engine stand and start the trans removal.
A brace to keep the torque converter in place during removal. Only needed to disconnect the cooling lines, filler tube and shift mechanism to be ready for removal. I’ll jack the car up good and high, put it on jack stands and then pull the trans out the front.
Trans out and waiting for me to make a dolly for it so I can move it around easily. It is a TurboHydro 350. I was hoping for a 700R4 overdrive or even a 2004R – earlier overdrives that swap into a ’79 Corvette.
All ready to be tucked away. I may or may not use it. It is the same as in the my Chevy so I might have it rebuilt and then installed with the original engine after I have it rebuilt. But I may opt to put in an automatic overdrive unit like the GM 200 4R or the 700 R4. The 200 4R is the same size as the TH350 above and so is easy to install. The 700 R4 is a bit longer and the driveshaft will need to be shortened and the rear cross-member changed. Lots of fun to look forward to in the months to come:-)
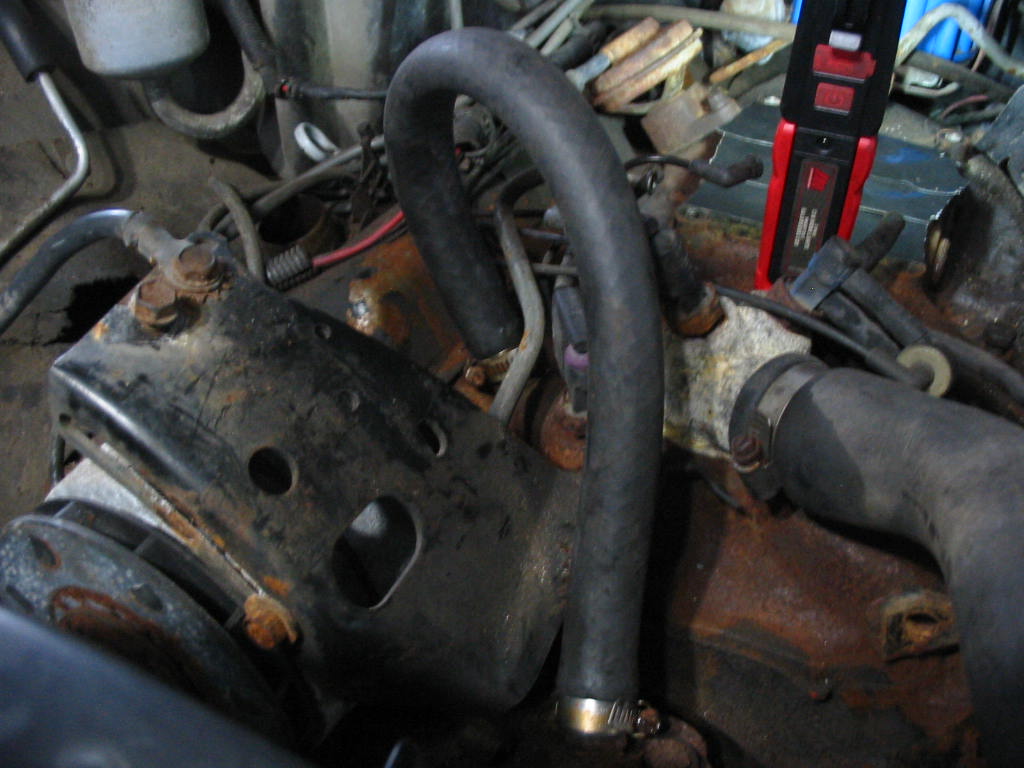
Starting the engine removal prep. the rad, rad shroud, alternator and fan have been removed. I also detached the trans cooling lines.
Easy to see the hidden timing mark tab in this shot.
Some good reusable parts for later. Especially the cruise control bits 🙂
One reusable bit is the AC throttle kicker. They’re quite expensive so I’m trying to save this one. The very fine ground connections from the internal coil was broken off.
I was able to get it reattached in another location so now I have a good backup unit. Just need to give it a coat of satin black.
Engine pretty well free and clear for removal. I will now drop the exhaust pipes, remove the torque converter bolts, the two lower bell housing bolts and empty the trans oil.
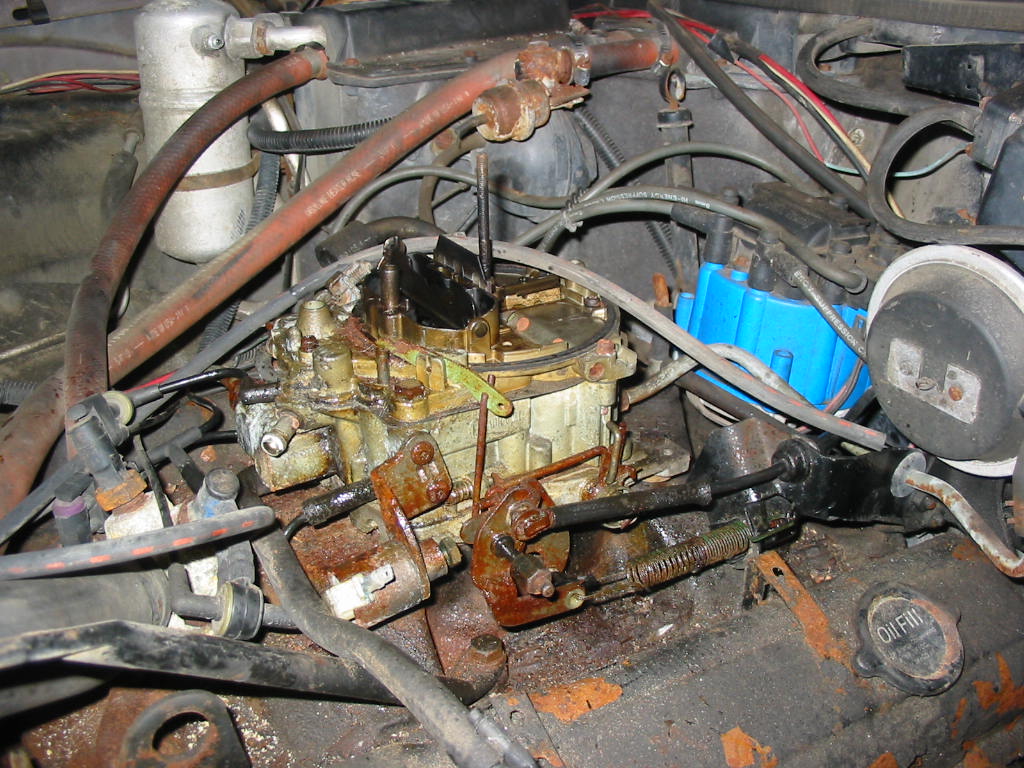
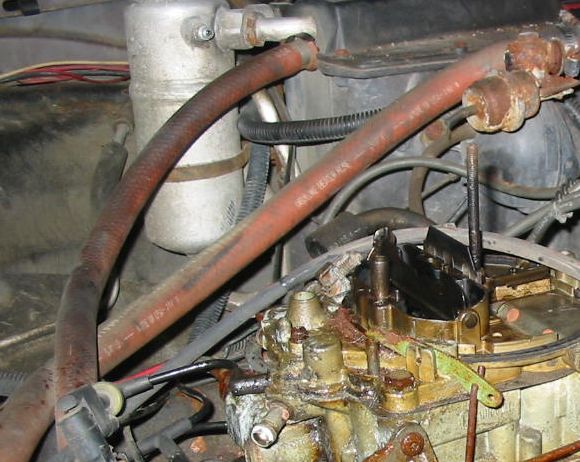
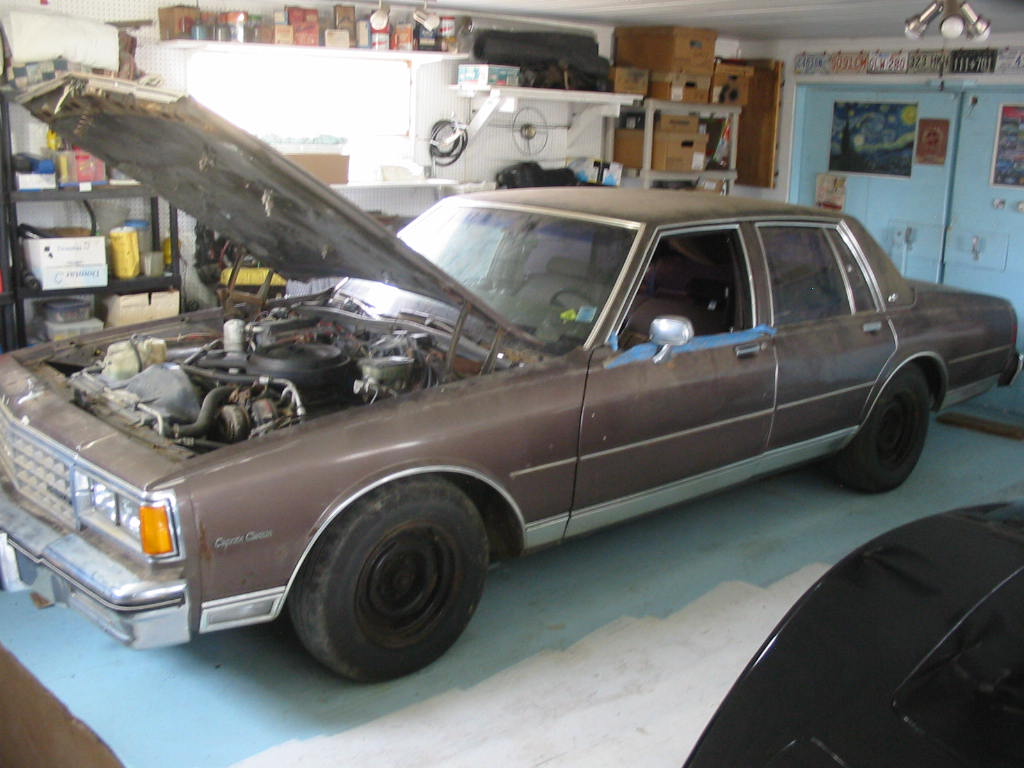
Cleaned up carb in place and the distributor as well.
For some reason there wasn’t the usual timing mark tab attached to the timing gear cover. Fortunately I have one from the GM crate 350 I picked up last fall expecting to use it for my C3, but it’s bearings were badly spun so it was too expensive to repair the block. Still it is supplying heads, valves, lifters, etc for when I rebuild the original C3 engine.
I over tightened the alternator belt and was then able to turn the engine with a ratchet on the alternator pulley nut. I then set the engine on TDC. I made sure I was on the compression stoke by using a compression tester on #1 cylinder. Even though I was turning the engine over slowly it still showed some compression as #1 TDC was approached.
Plugs were all firing good when the engine was stopped 20 years ago so I just cleaned up the threads before putting them back in the engine.
Plugs are typically hidden under the exhaust manifolds. I found a short piece of hose that fits tight over the plug end helps to get them into the hole and started.
I’m using a 4′ length of 3/8″ hose to connect the fuel pump to a jug of new gas. The stuff in the tank must be really ugly, if there is anything left after 20 years.
I connected my engine bump switch to the starter and the + side of the battery and used it to spin the engine over (before I put the plugs in) to check that the fuel pump was working. It was 🙂
Wires in place and in the correct sequence 18436572.
Here I installed a timing tab from the parts off the 350 crate engine that fellow club member Tim gave me. I thought that maybe the timing chain had be replaced and the timing tab didn’t get put back on. I tried to start the engine a number of times but no luck except for a few weak fires on what seemed like three cylinders. I tried advancing and retarding the spark, but no luck. I then thought that maybe the compression is so low that there isn’t enough to ignite the fuel and maybe I should squirt some oil in each cylinder and try it again. Checking online for the proper timing of a ’83 305 I discovered that there actually is a timing tab on the original 305 cover only it is not in the usual place and is hidden.
The original tab is on the top and was virtually invisible with a thick coating of oily crud and it us under the water pump at the very top of the cover – the bottom tab is the one I was using. Retarding the spark is towards the bottom of the photo. So my setting was way too retarded. The fuel was being sparked as the piston was dropping down so very little in the way of punch, but not so much that it was popping through the exhaust. To set the timing I needed to peer down behind the water pump to see the timing marks.
Once I got the timing reset the car started although it still had a hard time. I had been adding fuel to the carb as the engine was dry and normally it takes a lot of fuel to get them started – like when a newly rebuilt engine is started. It took a number of tries where the engine would slowly fire then quit. After about five tries – all with the pedal to the floor – she caught. I ran it for about 20 minutes mostly at a nice idle and then for a few minutes at 2000 rpm. Running well and I don’t see why it won’t be a good temporary engine for the my Chevy. I’ll now start getting ready to remove the engine and all the other parts that may be of use.
Don, the friend who brought the Caprice home, will then take it to his place where he may remove the rear end.
The carb linkages were exposed to moisture in the air and they are all corroded and seized. I sprayed a liberal coat of Fluid Film over everything, but still no luck in getting the linkages moving. It’ll have to come off and gone over on the bench.
Carb came out easily. The base gasket is still usable with just a little damage on the back side. I’ll use a bit of silicone on it when I do the install.;
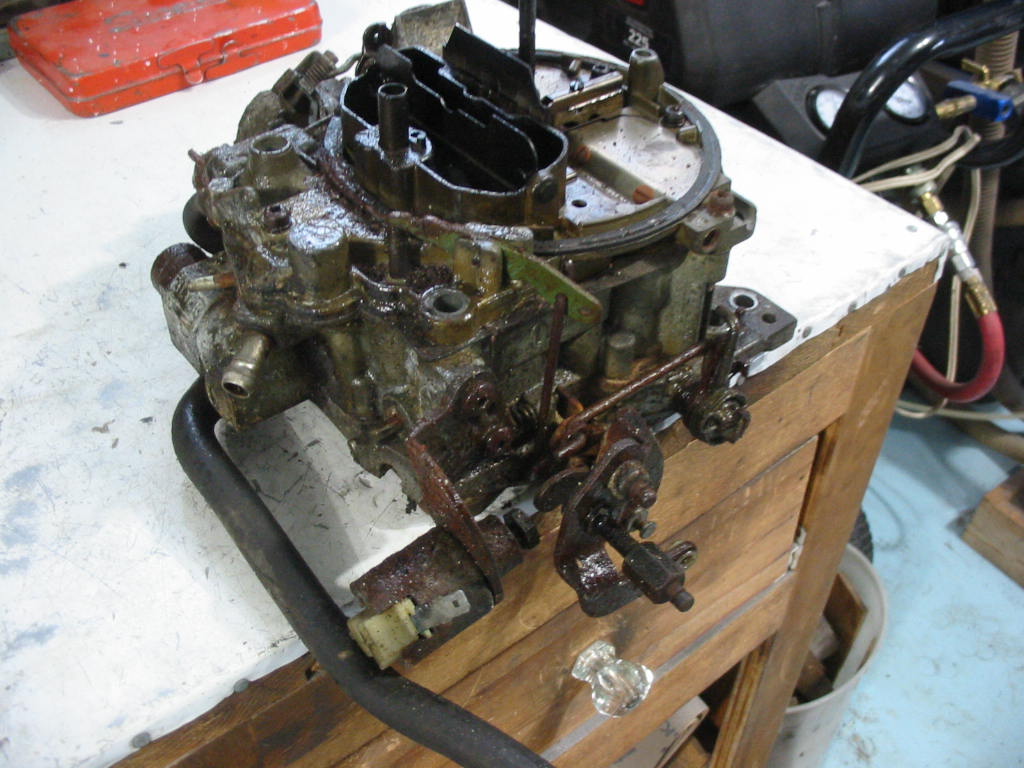
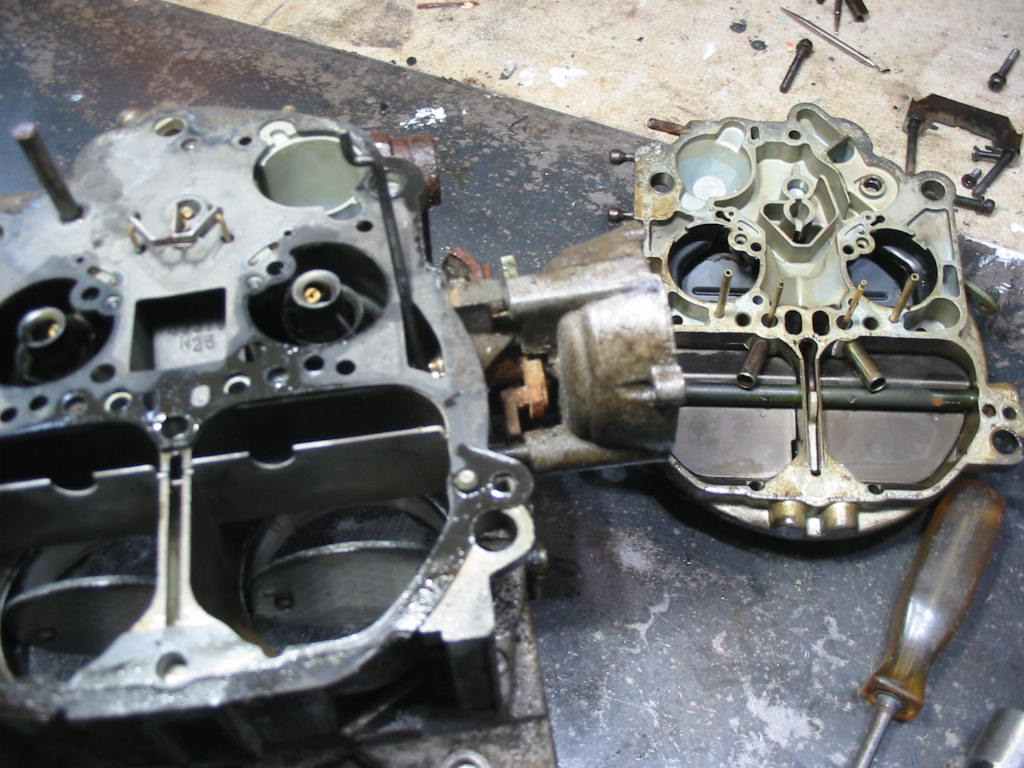
Top off and it’s dry and corrosion free on the inside – likely thanks to the air cleaner being on the car and its storage in a building with a wood floor. It was a little tricky using a thin utility knife to ease the upper gasket off. A bit of a pain putting the top back on. The primary needles (centre of the carb front section) are spring loaded and want to pop out of the jets. Only the gasket keeps them in place. The accelerator pump wants to push the gasket up. So three hands would be helpful to hole the accelerator pump rod down and then wiggle the top to fit in the gasket holes. That’s the only pain. Other than that they are pretty easy to clean and kit. The one now on the Corvette works real nice. No ‘bogging’ when the pedal is floored, just smooth acceleration. Air flow to the big back venturies is controlled by with the upper plates so that the air increase is gradual.
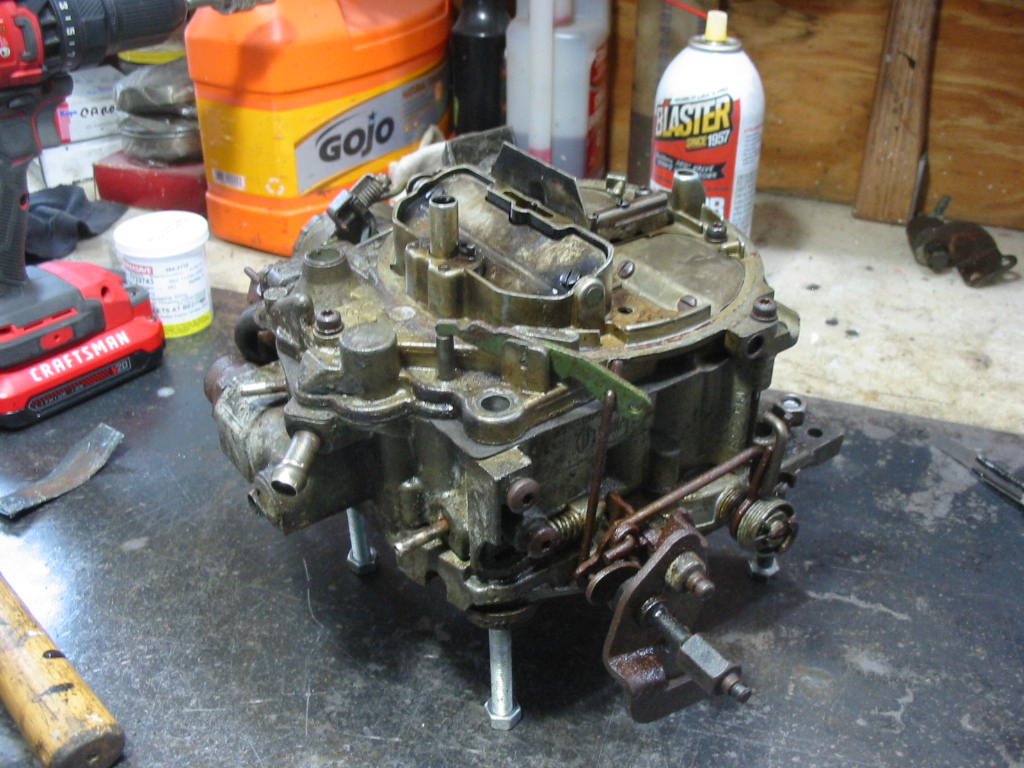
Back together and ready to go. It took a lot of penetrating oil to get the butterflies loose and operating freely. It could use a good dunking in carb cleaner, but I only need the carb to run for a short time to start and warm up the engine.
Time the hood was taken off. I’ll need to actually sit inside the engine compartment to work on the distrubutor. The engine bay is like a half-ton truck!
I hate pulling distributors because it’s so easy to mess up the timing. You need to note the location of the rotor before and after it is slipped by the cam gear. So you need to slowly pull the unit out. This unit was sticking on the gummy dried out oil. It too some sharpe snaps to get it out and of course I wasn’t sure of the final location of the rotor.
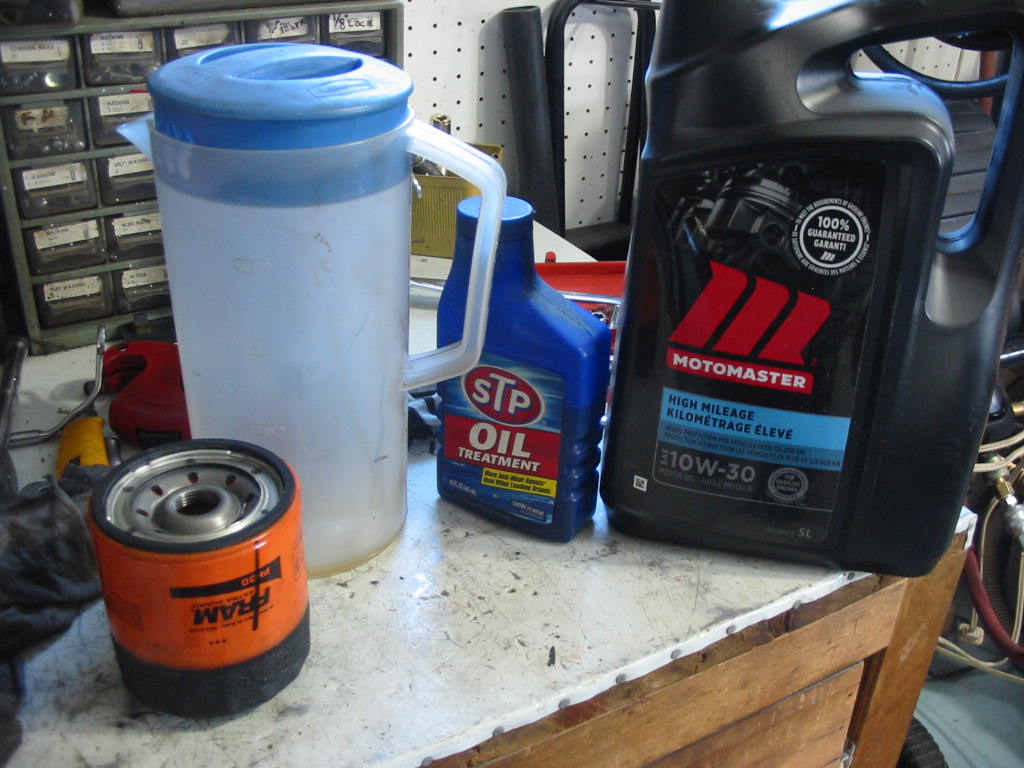
I had earlier drained the pan and removed the old filter. Now I’ll add new Motomaster 10W30 high mileage oil, some STP and a new filter. The engine has just over 100k miles so it is bound to be worn. The STP should help with piston ring and lifter sealing and maybe keep the cam going for a bit longer.
I picked up this Chev small block oil pump primer for a few bucks on Amazon. I popped it in place and spun the oil pump for at least a minute. When I removed it there was lots of oil in the valve lifter gallery – the end of the gallery can be seen through the distributor hole.
Nothing special to be done to the distributor just cleaning and grease. I cleaned the old oil residue from the shaft bushings and sprayed some white grease on the advance unit weights and springs.
I started the engine prep by removing the AC unit and PS pump and brackets. The AC pump is frozen, but I’ll keep it as a core.. The PS pump turns freely so I will keep it aside for a backup. Plugs all came out nicely and they were all firing well when the engine was finally stopped.
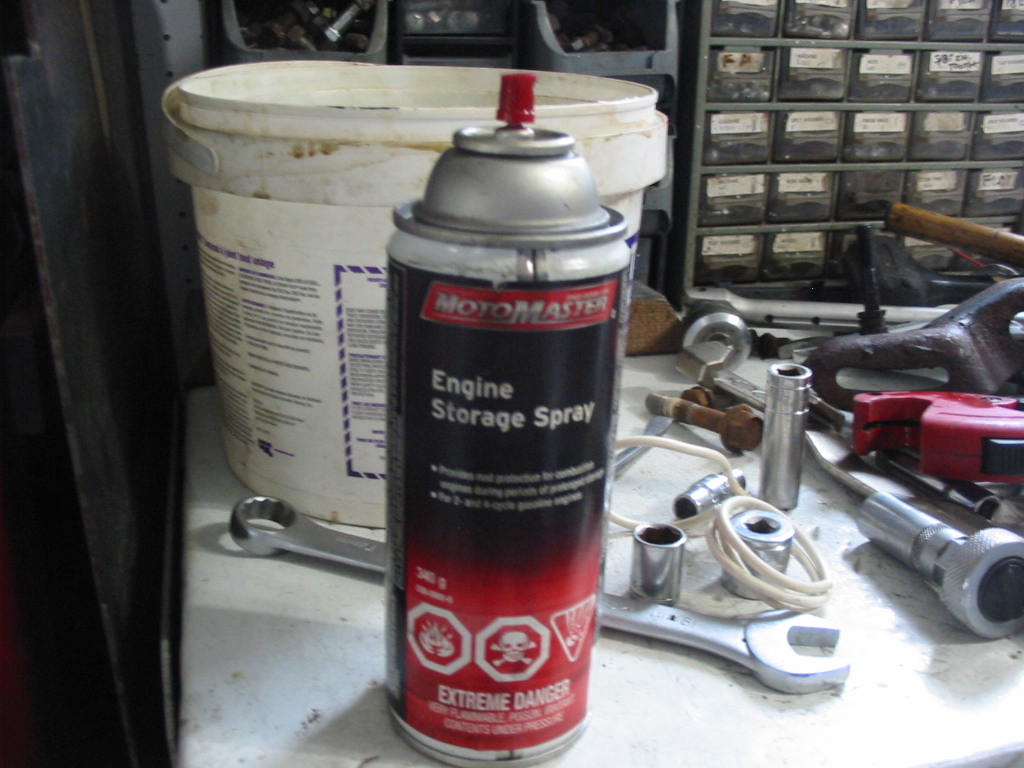
Next I fogged each cylinder with Motomaster Engine storage spray.
I then put the car up on jack stands and removed the plastic cover from the front of the transmission exposing the ring gear and torque converter.
Using a short pry bar I was able to easily turn the ring gear. So good so far. I don’t want to turn the engine too much with dry bearings. I’ll prime the oil pump first before turning the engine fully to be sure something isn’t stuck.
The heater hoses are showing their age and the one going to the heat control valve actually broke off.
Using a new piece of hose I simply joined up the heater intake and outlet fittings. Should be fine for the engine start.
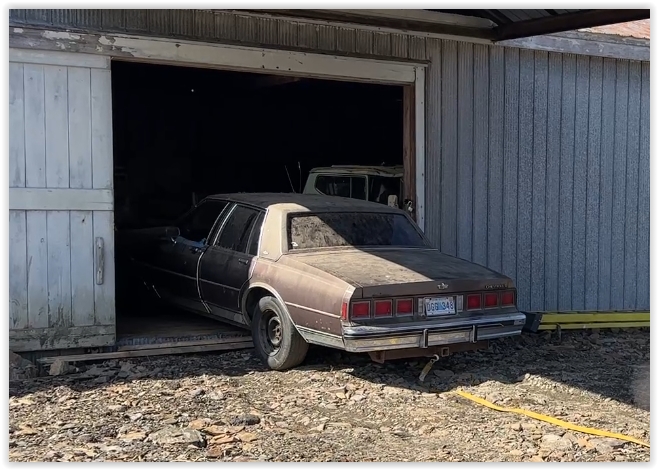
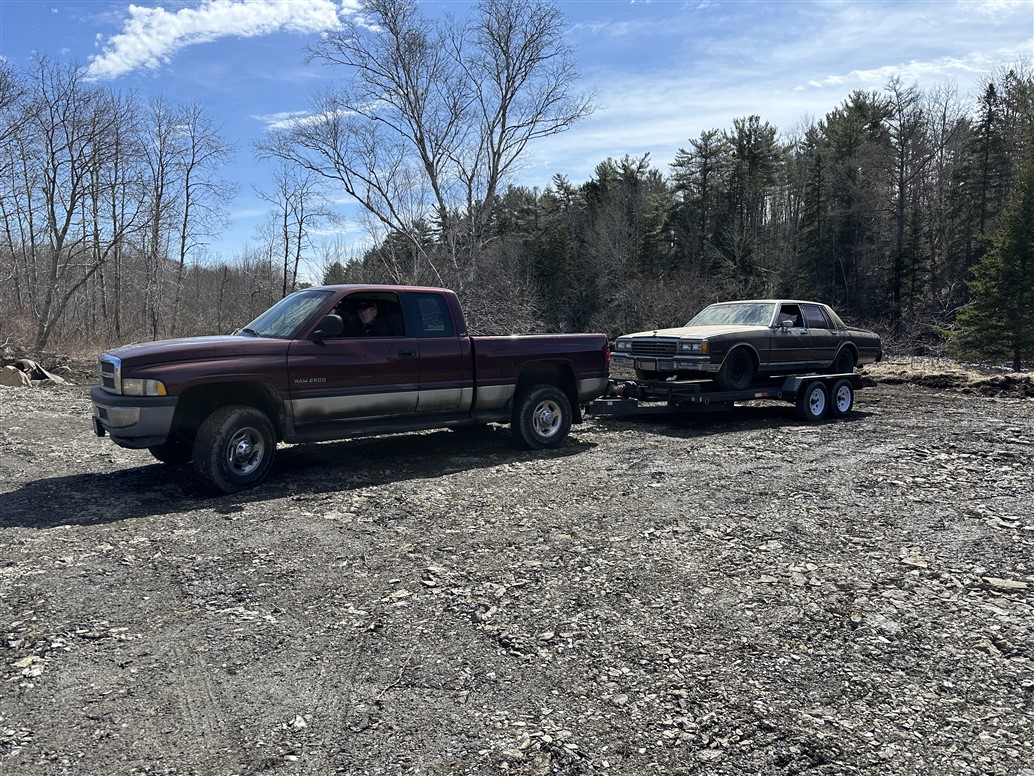
The ’83 Caprice that has a 305 4bbl engine with a 700R4 trans. It’s been sitting for over 20 years so the engine may be stuck.
Getting the Caprice out of the shed and onto the trailer wasn’t too difficult. Friend Don kindly supplied the Dodge diesel and hauler with winch. 350 km round trip to get the car home.
Home and in the garage. I’ll now begin the pre-start work.
The engine is un-molested and the breather is in place – less corrosion with it on. The AC pump is frozen. The belt was removed, so not in use when the car was stopped. Might be good for a core.
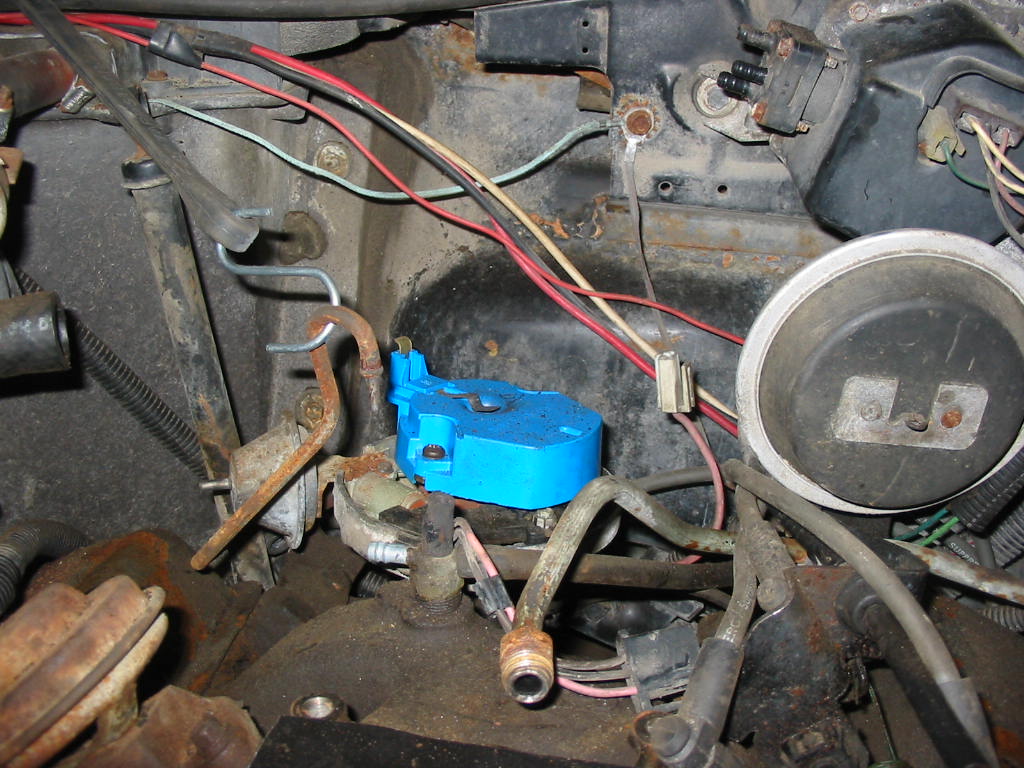
The cruise transducer. It is a three wire resume unit. If I can use it I will need to find a three wire resume/signal switch lever to install it in the Corvette. Unfortunately the one in the Caprice won’t transfer over.
Next: Getting the engine ready to test if it is seized.
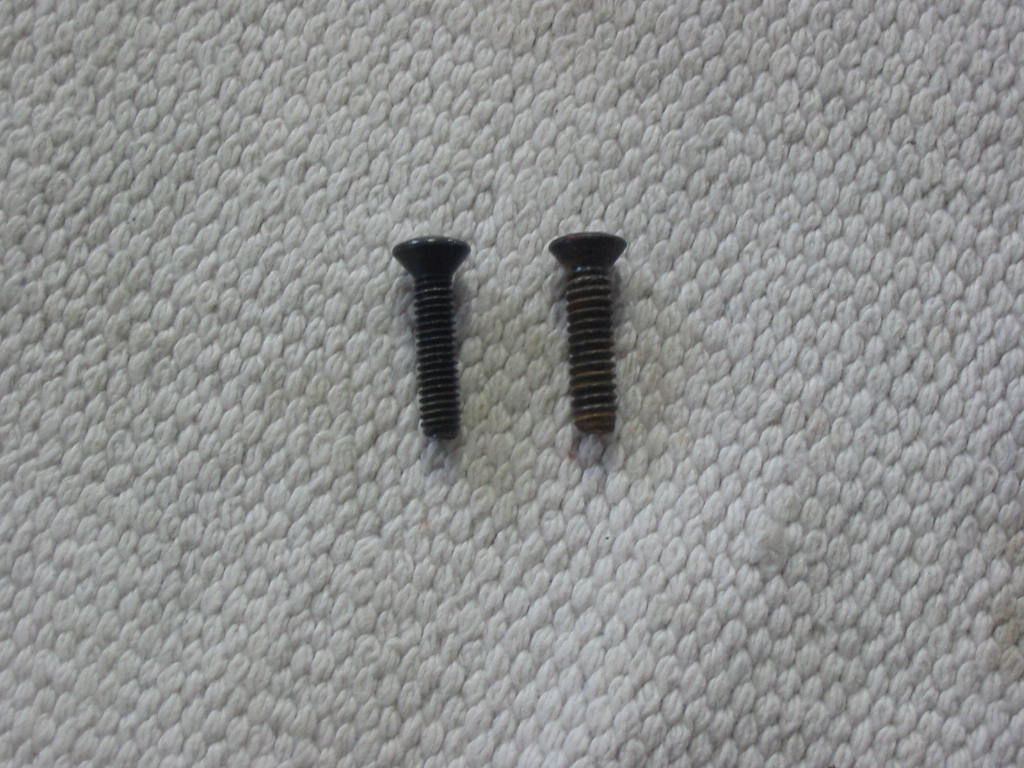
Parts in from Corvette Depot. Rocker trim screw kit, rear window clips, antenna support and two motor mounts. I”ll tackle the rocker trim screw kit first.
For some reason the old rocker panel screws were different from those sent from Corvette Depot. The new screws are listed on their package as being for a ’79 model. However the original screws (on the right) are 1/4″ vs the new ones that are 3/16″. This only affects the three centre screws on each side. The new screws seemed to grab OK on the left side, but I had to reuse the old screws on the right side. Not a problem for me as they will be all covered by a black pin stripe in the end.
I did manage to squeeze three new clips for broken originals, but I destroyed three and those that I did get in place are not likely to hold the trim very well. Fortunately there are enough original metal clips (the replacements are all plastic) to hold the trim in place. Looks good with the black accent stripe.
When I next have the trim off I will remove the interior trim around the window and then attempt to use small bolts to hold new plastic clips in place. It will take a very fine bolt to fit inside the plastic trim hole with the bolt head inside the car and a fine nut on the outside.
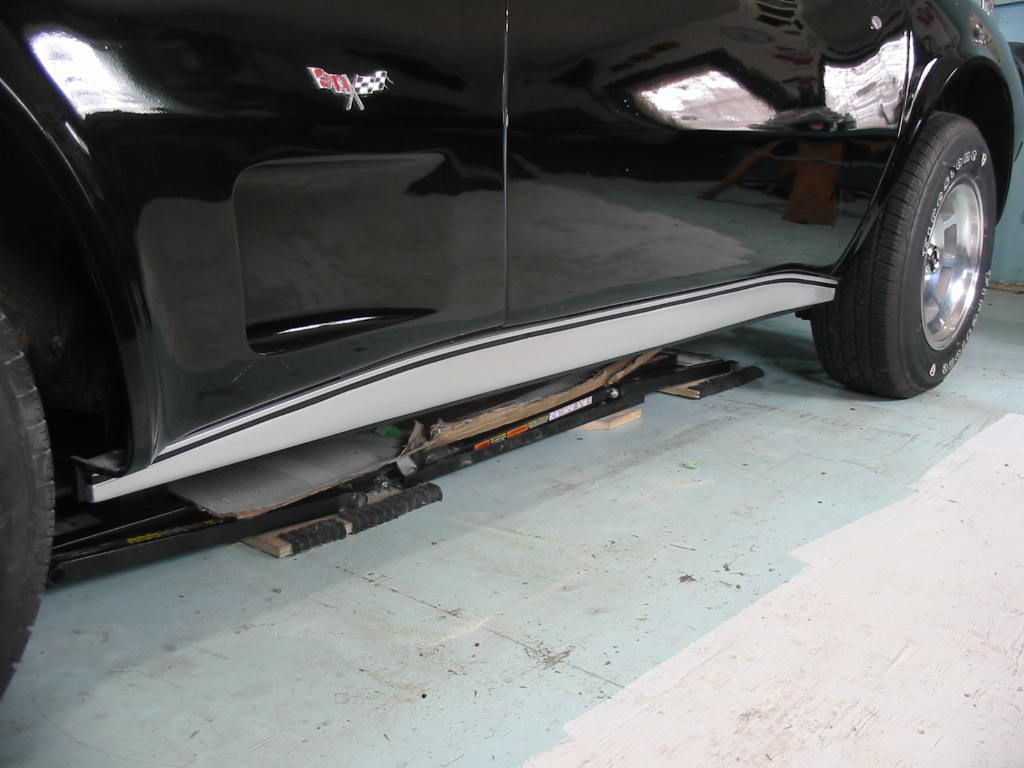
Rockers much improved with the 3/8″ pin stripe covering the attaching bolts.
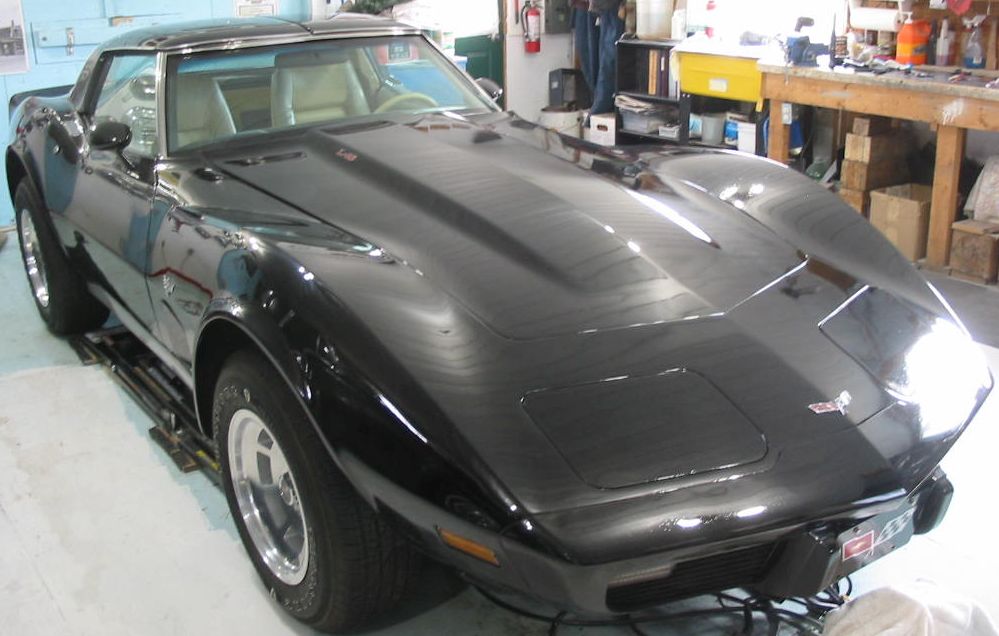
Back on the floor and ready for the road 🙂
In the meantime I replaced the steel wheels on my engine stand with larger rubber units that will hopefully not damage my wood floor so badly. I also have attached similar wheels that rotate to the both long arms of my engine ‘cherry picker’. I need to do this so that I can move the picker sideways as the C3’s engine has to be picked up from the side and then moved sideways out of the car.
Next: I won’t have too much to report on until I make arrangements to bring the ’83 Caprice home. I should have some news in April I hope.